Master Copperplate Calligraphy with Customizable Practice Sheets
Starting out in calligraphy can feel both exciting and a little overwhelming. You might have watched videos of master penmen creating elegant loops and swells, and wondered how they make it look so effortless. The truth is, behind every beautiful piece of Copperplate script lies countless hours of deliberate practice. But what does deliberate practice actually look like? For serious beginners and seasoned letterers alike, the foundation is almost always the same: precise, reliable guidelines. And that is exactly where a thoughtfully designed set of Copperplate Calligraphy Practice Sheets becomes your most valuable tool.
This is not about fancy decorative paper or expensive supplies. It is about structure. It is about training your hand to move with consistent pressure and angle until the muscle memory becomes second nature. The digital product we are exploring here offers exactly that structure, wrapped up in a clean, no-fuss PDF that you can print as many times as you need. Let us take a close look at what makes these sheets a smart addition to your practice routine, who they are for, and how to get the most out of them.
What Makes These Practice Sheets Different
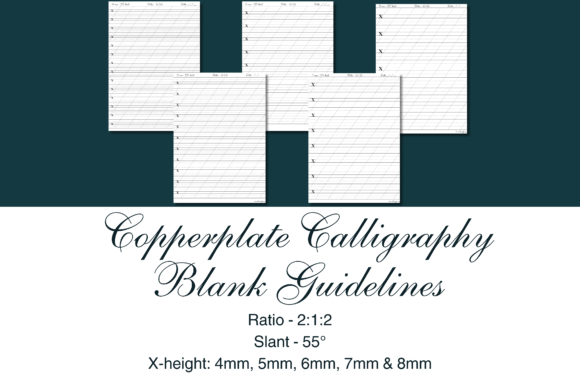
Copperplate calligraphy is defined by its distinctive 55-degree slant and carefully proportioned letterforms. If your guidelines are off, your script will never quite look right, no matter how much pressure control you develop. The Copperplate Calligraphy Practice Sheets discussed here are built around a 2:1:2 ratio. This means that for every one unit of x-height (the height of a lowercase letter like a, c, e, or o), the ascenders and descenders each measure two units. This classic proportion gives Copperplate its elegant, balanced silhouette and ensures that your loops, stems, and tails all fall in the right places.
The product includes five separate pages within a single PDF file, each offering a different x-height: 4 mm, 5 mm, 6 mm, 7 mm, and 8 mm. All pages follow the same 55-degree slant and 2:1:2 ratio, so you can start with a larger x-height when you are learning and gradually work your way down to finer, more delicate lettering. Having all five sizes in one download means you are not locked into a single scale. You can adapt your practice to the particular nib, ink, or project you have in mind.
Because this is a digital download, there is no physical product shipped to your door. You receive a PDF file immediately after purchase. You can print the pages on any A4 paper using a home printer, or take the file to a print shop if you prefer heavier stock. The beauty of this approach is that you can print a single sheet for a focused session, or print a stack of them for a full week of daily warm-ups. You never run out, and you never have to wait for a reorder.
Understanding the Features at a Glance
Before we dive into how to use these sheets, let us break down exactly what you are getting. This is a simple but deeply functional resource, and every element serves a purpose.
- Five x-height options: 4 mm, 5 mm, 6 mm, 7 mm, and 8 mm. Each is printed on a separate page within the PDF.
- 55-degree slant lines: Consistent across all pages, matching the standard Copperplate angle.
- 2:1:2 ascender-to-x-height-to-descender ratio: The classic proportion that defines Copperplate letterforms.
- Blank guidelines only: No pre-written letters, no tracing exercises. This is a pure grid for your own practice.
- A4 size: Standard European paper size, easily printable on most home printers.
- Single PDF file: All five pages are bundled together for convenience.
There is no extraneous decoration or distracting elements on these pages. The lines are clean, thin, and unobtrusive. They are designed to guide your pen without competing with your lettering. If you prefer to practice on a lightbox, these sheets also work well as a template placed under your practice paper.
Who Benefits from These Practice Sheets
The obvious answer is anyone learning Copperplate calligraphy. But let us get more specific, because different users approach these sheets with different needs.
Beginners Starting from Scratch
If you have never held a pointed pen before, starting with the 8 mm x-height sheets is a smart move. Larger letterforms give you more room to see your mistakes and adjust your pressure. You can focus on the basic strokes: the thin upstroke, the thick downstroke, and the delicate transitions between them. The 55-degree slant lines train your eye to keep every stroke at the correct angle, which is one of the hardest habits for new learners to develop.
Experienced Letterers Refining Their Script
Even seasoned calligraphers benefit from regular guideline practice. Switching to a smaller x-height, like 4 mm or 5 mm, challenges your control and forces you to be more precise. Many professionals use these sheets to warm up before tackling an important project, or to troubleshoot specific letters that are giving them trouble. Having all five sizes available means you can gradually reduce your x-height as your skill improves.
Teachers and Workshop Leaders
If you teach calligraphy classes, these sheets are an excellent resource to share with students. You can print a class set in whatever size suits your curriculum, or send the PDF to students for home practice. The consistent ratio and slant ensure that everyone is working from the same structural foundation.
Digital and Hybrid Calligraphers
Some calligraphers work on iPads or other digital devices. While these sheets are designed for print, you can also import the PDF into apps like Procreate, GoodNotes, or Notability and practice directly on your screen. The A4 size translates well to standard canvas sizes, and the clear lines are easy to trace with a stylus.
Real-World Scenarios: How to Use These Sheets
Let us imagine a few realistic practice sessions to show how these guidelines function in everyday use.
Scenario one: You are a beginner working through a Copperplate workbook. You have been struggling with the lowercase "h" and "p" because your ascender loop keeps collapsing. You print the 7 mm x-height sheet and spend 15 minutes drilling just the tall letters: b, d, f, h, k, l, and t. The 2:1:2 ratio shows you exactly how high your ascender should reach relative to the x-height. After a few sessions, your loops start to look consistent.
Scenario two: You are a busy professional who enjoys calligraphy as a creative outlet. You have only 10 minutes in the morning to practice before work. You print a stack of 5 mm sheets and keep them next to your desk. Each day, you pick a single letter and fill a row with your best attempt. Over several weeks, you notice your control improving even with limited time.
Scenario three: You are preparing a Copperplate quote for a wedding invitation. The final piece will be written at a small scale, so you need to practice at the actual size. You use the 4 mm sheet to plan your layout and practice the spacing between words. The slant lines help you maintain consistent angle across the entire line of text.
In all of these scenarios, the digital nature of the product is an advantage. You can print exactly what you need, when you need it, without worrying about running out of pre-printed pads.
Strengths and Practical Considerations
Let us talk honestly about what this product does well and what it does not try to do. Understanding both sides helps you decide if it fits your workflow.
Strengths:
- Immediate access: Digital download means no shipping delays. You can start practicing within minutes.
- Unlimited prints: Once you own the PDF, you can print as many copies as you like. Great for daily practice or classroom use.
- Progressive sizing: The five x-heights let you scale your practice from beginner-friendly large letters to advanced fine script.
- Clean, no-distraction layout: The plain guidelines keep your focus on the letters, not the paper.
Considerations:
- Physical paper not included: You need to supply your own paper and printer. For best results, use a smooth, bleed-proof paper suitable for pointed pen ink.
- No instructional content: These are blank guidelines only. If you need stroke-by-stroke tutorials or exemplar alphabets, you will need to supplement them with a separate instructional resource.
- Single size per page: Each page offers only one x-height. If you want to mix sizes on one sheet, you will need to print multiple pages and combine them manually.
How to Evaluate If These Sheets Are Right for You
Choosing practice guidelines is a personal decision. Here are a few questions to ask yourself before making a purchase or starting your practice.
- Do you prefer large or small lettering? If you are a beginner or have unsteady hands, larger x-heights (6–8 mm) are more forgiving. If you are experienced or working on detailed pieces, smaller sizes (4–5 mm) will serve you better.
- Are you comfortable printing your own materials? Digital downloads require a printer and paper. If you prefer the convenience of a pre-printed pad, you might look elsewhere. But if you like the flexibility to print on demand, this format is ideal.
- Do you already have a system for learning Copperplate? If you are following a course or a book, these guidelines will integrate seamlessly with your existing materials. If you are entirely self-taught, you might also want a reference sheet showing letterforms, but the guidelines themselves are rock solid.
Practical Tips for Getting the Most Out of Your Practice
You have the PDF. You have printed a few sheets. Now what? Here are a few strategies to make your sessions more effective.
- Warm up with basic strokes: Before writing full letters, fill a row with thin upstrokes and thick downstrokes. Focus on the transition points where pressure changes.
- Alternate between sizes: Spend one session at 8 mm to loosen up, then switch to 5 mm for precision work. The contrast challenges your muscle control.
- Use a slant guide ruler: Even with printed slant lines, a transparent slant guide ruler helps you check individual stroke angles as you write.
- Label your practice: Write the date and x-height at the top of each sheet. This helps you track your progress and notice patterns over time.
- Print on good paper: Standard printer paper is fine for initial warm-ups, but for serious practice, use a smooth calligraphy paper like Rhodia or HP Premium32 to avoid ink feathering.
Final Thoughts on Building a Practice Routine
Copperplate calligraphy is a skill that rewards patience and structure. No amount of expensive ink or fancy nibs can replace the steady repetition of correct practice. The Copperplate Calligraphy Practice Sheets featured here strip away the distractions and give you exactly what you need: consistent, well-proportioned guidelines in a range of useful sizes. Whether you are a complete beginner or a letterer looking to refine your hand, this digital download offers a simple, practical foundation for your work.
The fact that it is a PDF you can print at home means you are never stuck waiting for supplies. You can practice for five minutes or fifty, on your schedule, with no waste. And because the ratio and slant are true to traditional Copperplate standards, you can trust that the structure you are building will carry over into every project you undertake.
If you have been looking for a straightforward, no-nonsense resource to support your calligraphy journey, this set of guidelines deserves a spot in your toolbox. Print a sheet, pick up your pen, and let the lines guide your hand. The progress will come one stroke at a time.
Remember: this is a digital download. You will not receive any physical product. The PDF file contains five blank guideline pages at 4 mm, 5 mm, 6 mm, 7 mm, and 8 mm x-heights, all with a 55-degree slant and a 2:1:2 ratio, formatted for A4 paper.